Silence is golden, so they say, and using it in your productions can yield great creative dividends.
Here’s how you can use automation to manage silences and add a sense of drama and anticipation.
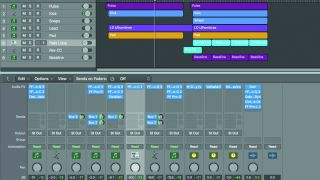
Step 1: We begin with a delay-heavy bassline, kick drum, pad and lead synth. After a bar break (at Bar 10), the arrangement develops with a drum loop, finger snaps and a second bass. We want to clear more space out of the mix at Bar 10, in order to make this transition more dramatic.
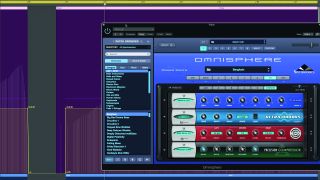
Step 2: We address the Omnisphere bass pulse first. The delays are coming from Omnisphere’s internal effects and we want to kill the delay returns and the natural release tail of the core sound too. An abrupt volume automation cut does both, with the ramp coming back up in time for the second phrase.
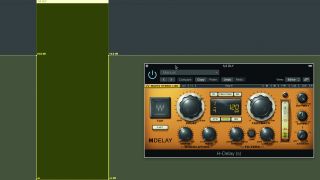
Step 3: Next we automate the volume of the 1/4-note delay added to the lead synth. This works nicely throughout the track, but we want the single note at Bar 10 to be more isolated and haunting. Dropping the effect return level to zero achieves this nicely.

Step 4: The natural release tail of the pad sound is quite long and is filling in plenty of the space at Bar 10. We turn our attention to that sound next, dropping the volume level to zero, just as we did with the pulse bass sound in step two.
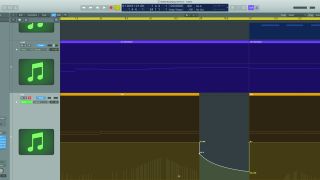
Step 5: This sounds a little unmusical. There’s a compromise we can achieve here; dropping the pad level dramatically but retaining a little more of its natural release. We drop it 6dB at Bar 10, then draw a ramp to further reduce its volume, before it jumps back up at Bar 11.
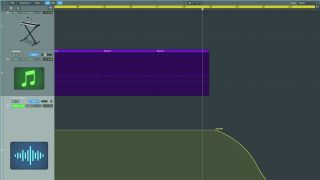
Step 6: Managing silence at the end of a track is important too. We have a number of sounds ending with long reverb tails. These could fade more musically than they do without intervention. Adding an automation line to the master output fader is a good idea, particularly contouring these with non-linear curves.